How to skin uphill efficiently
Set a skin track between about ten and fifteen degrees, which is much shallower than most people choose, and slide the ski forward along the snow rather than lifting it. Use heel risers only on sustained steep sections. Technique saves more energy on a climb than any equipment choice, and a track that is too steep slips, burns calves and slows the whole party.
Skinning looks like walking with skis on and it is not. The efficient version is a slide rather than a step, on a track much shallower than instinct suggests, at a pace slower than you want to go for the first ten minutes. Getting those three things right saves more energy over a day than any equipment decision available to you.
Track angle: the thing almost everyone gets wrong
A sustained skin track should sit between roughly ten and fifteen degrees. That feels unambitious. It is also what lets you keep the whole skin in contact with the snow, keep your ankle inside its comfortable range, and maintain a rhythm for hours.
A track that is too steep costs you three ways simultaneously. The skins slip, so you waste energy recovering and stamping. Your calves fatigue because your ankle is held near the end of its dorsiflexion the whole time. And everybody behind you is slower, which on a party day compounds into finishing in the dark.
Field checks that work without a slope meter: you should be able to talk in complete sentences, your heel should be able to stay down through most of the stride, and you should not be pushing off your toes. If any of those fails, the track is too steep. Zigzag more and gain height with distance rather than with angle.
The stride
- Slide, do not lift. Push the ski forward along the surface. Lifting the ski costs energy on every stride and there are thousands of strides in a climb.
- Weight over the middle of the foot. Weight on the tail lifts the front of the skin and is a common cause of slipping that gets blamed on the skins.
- Let the skin grip. Do not stamp for purchase. The plush grips when it is loaded flat, and stamping unloads it.
- Short strides on steeper ground. A long stride on a steep track is where the slip happens, because the ski is least loaded at full extension.
- Poles for rhythm and balance. Arms are a small fraction of your power. Use them to keep cadence, not to pull yourself up.
An adjustable pole with an extended grip is what makes this work across changing terrain: short for a climb, choked down for a sidehill, and back to full length for the descent without stopping to adjust.
Touring poles
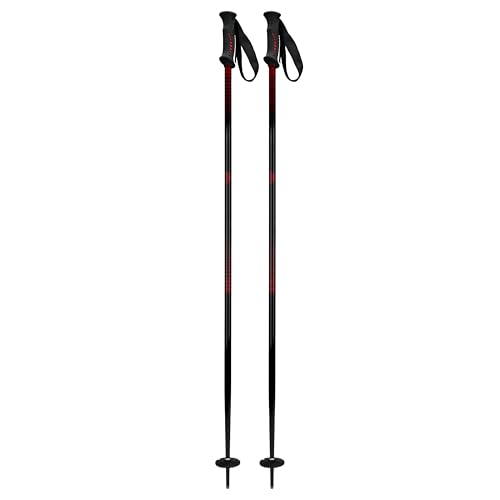
5th Element Shadow Aluminium Ski Poles
- Material:
- Aluminium
- Grip:
- Adjustable strap
- Use:
- Resort
A ski pole is a stick with a basket. Aluminium bends rather than snapping, which is the failure mode you want, and a resort pole spends its life being stepped on in a lift line.
Best for: Resort skiing and a first pair.
What it costs you: Fixed length, and no use for touring where you want the pole shorter on the climb.

LEKI Sherpa Lite Ski Poles, 100 to 135 cm
- Adjust:
- 100 to 135 cm
- Basket:
- Powder basket
- Grip:
- Extended foam
Adjustability is not a luxury on a tour: you want the poles short and the extended grip in hand for a steep skin track, and full length for the descent. An extended foam grip lets you choke down on a sidehill without stopping to adjust.
Best for: Touring, and resort skiers who want one adjustable pair.
What it costs you: Heavier and more failure points than a fixed pole, and a locking mechanism can slip in deep cold.
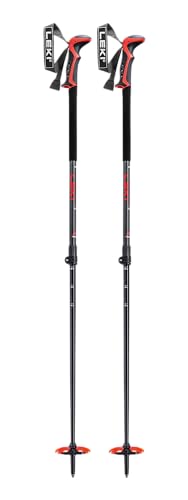
LEKI Haute Route 2 Ski Poles, 110 to 150 cm
- Adjust:
- 110 to 150 cm
- Baskets:
- Interchangeable
- Use:
- Ski touring
A forty centimetre adjustment range covers a flat approach, a steep sidehill and a descent without compromise. Interchangeable baskets matter because a summer basket sinks straight through spring snow.
Best for: Ski touring and traverses with varied terrain.
What it costs you: Long collapsed length compared to a folding pole. Awkward strapped to a small pack.

LEKI Helicon Lite Ski Poles, 110 to 145 cm
- Adjust:
- 110 to 145 cm
- Weight:
- Light aluminium
- Use:
- Fast touring
Weight in a pole is lifted and swung thousands of times an hour, which is why it is felt more than weight anywhere else on a touring setup. This is the light option that is still a serious pole.
Best for: Long tours and skimo-adjacent days.
What it costs you: Lighter shafts are less tolerant of being levered on. Do not use a light pole as a pry bar.
Specifications are the manufacturer's published figures, not measurements we took. Sizes, prices and stock change constantly, so confirm on the retailer page before buying. We earn commissions from Backcountry and from qualifying Amazon purchases, and every link on this page is one or the other. Where a Backcountry button reads "shop the category" it opens a search for that category rather than that exact model, so it finds comparable gear alongside it.
Heel risers
Risers lift your heel so your ankle sits in a more neutral position on a steep climb, which cuts calf strain substantially. Most touring bindings offer two heights.
Use the lowest riser that keeps your ankle comfortable, and drop them as soon as the angle eases. Leaving risers up on flatter ground raises your centre of gravity, reduces the tail contact of the skin and makes the stride less stable, which is a slow leak of both energy and grip. Learn to flip them with a pole basket rather than bending down: it takes a fraction of the time and you do not lose your rhythm.
Kick turns
A kick turn is how you reverse direction on a traverse, and it is the technique that most often goes wrong on exposed ground.
- Choose the spot. The flattest, most supported piece of the traverse. Stamp a small platform if you need to. Turning on the steepest part is the usual mistake.
- Plant both poles on the uphill side. They are your support through the whole movement, and they should be planted before you start.
- Step the uphill ski around first. Lift the tip, swing it to point the new way, and set it down. Keep your weight on the downhill ski throughout.
- Transfer weight, then bring the second ski round. Deliberately, not in a hurry. Rushing puts your weight between the skis, which is where falls come from.
- Practise on gentle ground. The first time you do one should not be on an exposed sidehill above a terrain trap.
Sidehilling and firm snow
Traversing a firm slope is where technique stops being sufficient. The technique part is to roll your ankles into the hill so the uphill edge engages, keep your weight over the downhill ski, and choke down on the uphill pole using the extended grip so both poles are useful.
When the surface is refrozen and the edges will not hold, the answer is equipment rather than effort. Ski crampons clamp between the boot and the binding and bite into snow that a skin cannot hold. They weigh almost nothing, they live in the pack all season, and on a spring morning tour before the surface softens they are the difference between climbing and turning around.
Ski crampons and boot crampons

Tyrolia Ambition Ski Crampon, 105 mm
- Width:
- 105 mm
- Fits:
- Tyrolia and compatible touring bindings
- Use:
- Firm and refrozen snow
A ski crampon bites into refrozen snow that skins cannot hold, which is the situation on any spring morning tour before the surface softens. It weighs almost nothing and it is the difference between climbing and retreating.
Best for: Spring touring, early starts, and anything on a firm morning surface.
What it costs you: Binding-specific. Check the fit against your exact binding model, not just the brand.

Grivel Ski Tour New-Matic Crampons
- Type:
- Boot crampons
- Binding:
- New-Matic
- Use:
- Bootpacking and ice
These go on the boot rather than the binding, for the section of a ski mountaineering objective where skinning stops and climbing starts. Different tool, different job, and confusing the two is a common and dangerous mistake.
Best for: Ski mountaineering with real bootpacks and firm couloirs.
What it costs you: Not a substitute for ski crampons and not a beginner purchase. Steep firm snow with crampons and no training in self-arrest is a serious hazard.
Specifications are the manufacturer's published figures, not measurements we took. Sizes, prices and stock change constantly, so confirm on the retailer page before buying. We earn commissions from Backcountry and from qualifying Amazon purchases, and every link on this page is one or the other. Where a Backcountry button reads "shop the category" it opens a search for that category rather than that exact model, so it finds comparable gear alongside it.
Pacing, and why it is slower than you think
The efficient pace is conversational. Most people set off far too fast, overheat, soak the base layer they will then stand around in at the transition, and pay for it in the last third of the climb.
Planning figures worth using: a thousand to fifteen hundred vertical feet per hour for a fit party on a broken track, considerably less when breaking trail, and considerably less again in deep snow with a party rotating through the front. The touring time calculator uses the Munter method with a trail-breaking correction, and the pace chart gives honest numbers.
Two habits that help more than fitness does. Start cold, meaning strip a layer at the car so you are slightly uncomfortable for the first five minutes rather than soaked by minute twenty. And set the party pace to the slowest person from the start rather than expecting them to catch up at each transition, which never happens and simply means one person never rests.
Skin care on the hill
Two failures interrupt more climbs than anything else. Glopping is snow building up under the skin, caused by meltwater refreezing in the plush, and it is fixed with a bar of skin wax that costs a few dollars and lives in the lid of your pack. Glue failure is the skin peeling off, and it is caused by cold, wet or dirty glue.
The habit that prevents the second one is keeping skins inside your jacket between laps rather than in a cold pack pocket, so the glue stays warm and tacky. A ski strap wrapped around ski and skin is the field fix that gets you home when the glue quits entirely. The skin care and glue repair guide covers drying, storage and reglueing properly.
Climbing skins

Black Diamond Ascension Nylon Climbing Skins, 163 cm
- Plush:
- 100 percent nylon
- Grip:
- Highest
- Glide:
- Lowest
Nylon grips better than anything else and forgives a badly set skin track, which is exactly what a new tourer needs while they are still learning to set one. Grip is the specification that keeps you upright on a steep traverse.
Best for: A first pair of skins, and steep or icy skin tracks.
What it costs you: Slow. Nylon glides poorly, absorbs more water and packs bulkier than mohair.

POMOCA Climb 2.0 Ready2Climb Skins, 100 mm
- Plush:
- Mohair and nylon mix
- Fit:
- Pre-cut Ready2Climb
- Glide:
- Good
A mohair and nylon mix is the honest compromise, and it is the one most experienced tourers land on. Pre-cut means the trimming is already done, which removes the single most-botched job in touring.
Best for: Most tourers, most of the time.
What it costs you: A mixed plush grips less than pure nylon on ice and glides less than pure mohair on the flat.

POMOCA Climb Pro Mohair Ready2Climb Skins, 100 mm
- Plush:
- Mohair
- Glide:
- Highest
- Grip:
- Lower than nylon
Mohair glides so much better than nylon that on rolling terrain you stop lifting your skis and start sliding them, and over a long day that is a genuine energy saving rather than a marginal one.
Best for: Long days, rolling approaches, and tourers who set a sensible skin track.
What it costs you: Wears faster, grips less on ice, and costs more per season. A poorly angled skin track will slip.

POMOCA Tour Pro Ready2Climb Skins, 100 mm x 180 to 189 cm
- Plush:
- Mohair mix
- Length:
- 180 to 189 cm
- Width:
- 100 mm
Sized for a long, wide freeride touring ski, which is where most skin buying goes wrong: a skin narrower than the ski tip leaves the shovel bare and the ski washes out on a firm sidehill.
Best for: Long wide skis, from about 180 cm up.
What it costs you: Expensive, and more skin means more weight and more bulk to fold.
Specifications are the manufacturer's published figures, not measurements we took. Sizes, prices and stock change constantly, so confirm on the retailer page before buying. We earn commissions from Backcountry and from qualifying Amazon purchases, and every link on this page is one or the other. Where a Backcountry button reads "shop the category" it opens a search for that category rather than that exact model, so it finds comparable gear alongside it.
Where the skin track fits in the day
A well-set skin track is also a safety decision, not only an efficiency one. The track determines which slopes you cross, how long you are exposed under them, and where the party is bunched together. Setting a track that traverses under a loaded slope because it is the efficient line is exactly the kind of decision an avalanche course teaches you to notice.
Plan the tour with the tour planning guide, read the forecast before you choose the objective, and price the equipment on the first touring setup once the training is in place.
Frequently asked questions
How steep should a skin track be?
Between about ten and fifteen degrees for a sustained track, which is considerably shallower than most people set. A track that feels efficient because it gains height quickly is usually too steep, and it costs you in three ways at once: your skins slip, your calves fatigue because your ankle is held at the limit of its range, and the party behind you slows down. A useful field check is that you should be able to hold a conversation and keep the whole skin in contact with the snow without lifting your heel. If you are pushing off your toes, the track is too steep.
What is the correct skinning technique?
Slide the ski forward along the snow rather than lifting it, keep your weight over the middle of the foot, and let the skin do the gripping instead of trying to stamp for purchase. The stride is a shuffle rather than a step. Lifting the ski wastes energy on every stride and multiplied over three thousand vertical feet that is the single largest inefficiency available to a new tourer. Keep your hands relaxed on the poles and use them for balance and rhythm rather than for pulling, because your arms are a small fraction of the available power.
When should I use heel risers?
On sustained climbs steeper than a gentle grade, and off again as soon as the angle eases. Risers lift your heel so your ankle sits in a more neutral position, which reduces calf strain substantially on a long climb. The mistake is leaving them up on flatter terrain, where they raise your centre of gravity, reduce the skin contact at the tail and make the stride less stable. Most bindings offer two riser heights; use the lowest one that keeps your ankle comfortable, and get into the habit of flipping them with a pole basket rather than bending down.
How do I do a kick turn?
Set up on a small flat platform if you can make one, plant both poles on the uphill side for support, and step the uphill ski around first so the tip points in the new direction, keeping your weight on the downhill ski while you do it. Then bring the second ski around. The two common failures are trying to turn on the steepest part of the traverse rather than stamping a platform, and rushing so your weight ends up between the skis. Practise on gentle ground before you need to do one on an exposed traverse, because that is where a fall matters.
What do I do when my skins keep slipping?
Reduce the track angle first, because that is the cause about eighty per cent of the time. Then check that your weight is over the middle of the foot rather than back, since weight on the tail lifts the front of the skin off the snow. Then check the skins themselves: glopping, meaning snow building up underneath, is fixed with skin wax, and worn plush eventually simply stops gripping. If the surface is refrozen and firm, no adjustment to technique will help and the answer is ski crampons, which bite into snow that skins cannot hold.
How fast should I be going uphill?
Slow enough that you could hold a conversation, which for most people is well below the pace they set for the first ten minutes. Skinning is an endurance activity and the efficient pace is aerobic rather than hard, because you have three to five hours of it and then a descent to ski while tired. A common and useful figure for planning is a thousand to fifteen hundred vertical feet per hour for a fit party on a broken track, and considerably less breaking trail. Set the pace to the slowest person rather than expecting them to catch up at the transitions.
How we choose: we compare published manufacturer specifications, published certification standards and verified owner reviews across retailers. We do not test equipment in person, and every figure quoted here is the manufacturer's published number unless we say otherwise. This is researched buying guidance and not professional instruction: binding release values are set by a certified technician on a calibrated jig, and avalanche terrain requires formal training and a current regional forecast that no article can replace.